Freelance Child Theme By Studiopress
The Freelance child theme uses the Genesis framework by Studiopress. It is simple, yet elegant in its design and is perfect for those wanting style and simplicity. It is not mobile responsive, which may deter some people, however I know I have had requests for non-responsive websites.

If you are someone that likes a website to stay static, without responsive features, this theme may be the one for you.
It also has an excellent header design to place your logo, but if you don’t want a logo, the default font is eye-catching in itself.
The design comes in 6 layout options, giving you different sidebar and content combinations. For example you may want a full width page for a sales page, or you may want specific pages to have a left and right sidebar surrounding your main content or just one sidebar on the left or right.
This is the beauty of most of the themes on Genesis. Plus you have your threaded comments and featured image options.
If you have any questions relating to your new Freelance child theme, you can ask in the support forum or you can click the image below to automatically download a PDF “An Introductory Guide To The Genesis Framework”.
If you would like to purchase this theme you can do so here…”Freelance Theme” or I can customize the theme for you! Just ask me…

If you have any questions about this theme or would like me to answer any questions, just ask me in the comments below. I may be able to help you with your questions.
Disclaimer: I am an affiliate for Studiopress and their beautiful Genesis child themes.
 7 Reasons To Use WordPress For Your Website
 Do You Lose Customizations If You Update Dynamik Website Builder?
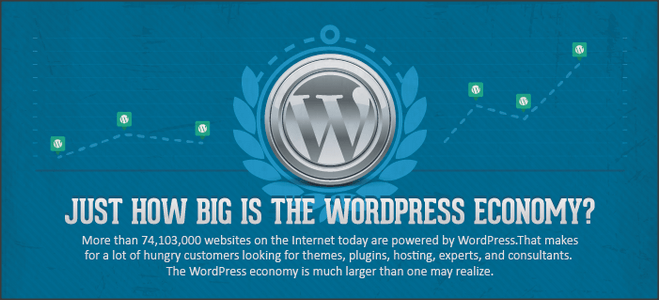 WordPress For Web Design Gets Bigger Everyday
 How To Create Categories and Tags In WordPress
 Cloaking Affiliate Links – Pretty Link Pro or PHP Redirects
So how do I add the menu on top such as: Home, Sample Page, Page Layouts, Page Templates, Contact Page. Okay, I just have to wait for your answers and figure this out myself while waiting for your answers. Sorry, I feel bad that I left 3 comments here already. Just want to get this thing going…
Hi Angela,
Yes, you have to install and activate the Genesis theme too. Once you do the Freelance child theme will show.
So how do I add the menu on top such as: Home, Sample Page, Page Layouts, Page Templates, Contact Page. Okay, I just have to wait for your answers and figure this out myself while waiting for your answers. Sorry, I feel bad that I left 3 comments here already. Just want to get this thing going…
That’s fine! I was busy with a client but I am always happy to help!
The top navigation bar is a ‘custom menu’. Are you familiar with custom menus? That’s how you make your desired link choices. You will see in your dashboard, ‘Appearance’ – ‘Menus’. There you make your menus. I can help you if you are not sure what to do.
Once you have created your menus you can then add them to your theme! You go to the Genesis settings and check the box for primary and secondary navigations.
Try those few things and let me know how you go!
I’m still very confused. I installed Genesis & Freelance in the “theme” section of WordPress. You can check my blog there. It’s not together. I tried posting a photo in there? It’s not showing. So I’m not sure if Freelance should be IN Genesis folder.
You are going great!
The image is a ‘featured image’ which is displayed by dropping the Genesis Featured Page Widget to the Home Middle #1 section.
So if you have a special page for the front of your site, that is the ‘page’ you choose in the widget configurations.
For the image size choose the setting 580×275.
Then just repeat for Home Middle #2 and Home Middle #3 by dropping in a Featured Page Widget.
Once you have your site will start to look like the Freelance them shown in Studiopress.
I have the freelance them on my blog. I simply love it. However would like to know how to remove the bullet lists on the footer section.
Paul
Hi Paul,
In the CSS you will see some code like this:
list-style-type: square;
You need to change the footer unordered list to:
list-style-type: none;
In the footer there is no actual code for lists, so you may have to add extra code in the footer section.
I noticed that the list in question is the “Meta” widget. I always like to remove that from any website and just login using the address bar. (Your web address with /wp-login.php).
Another option you have if you are not happy making changes in the CSS is to use a ‘Text’ widget and make your list in html, without using the list code.
I just peaked to see how you went. Perfect! 😉
Hi!
I am wondering how to remove the gray bar at the top of the page with this theme? Or is it part of the background?
Thank you
Hi Nicola,
Yes, it is part of the theme, but you can still remove it. If you go to your themes folder using your ftp client and look for the bg.png image in your images folder, you can just rename it (in case you want to use it later).
This is the file path to find the image:
yourdomain.com/wp-content/themes/freelance/images/bg.png
I like to just rename the image to something like bg-renamed.png
I hope that helps! Have a lovely day!
Susan
Super thanks for the reply! I can definitely work with that.
Its a lovely theme.
You are most welcome!
Hi I have another question for you!
If I wanted to upload a background for a custom navigation bar/menu, how would I do that?
I know that I have to put this code in the right section:
background: url (new menu design.png);
But the problem is, I want to make the menu taller, and I want to add some graphics to the end of the menu that kind of stick out above it and overlap the header.. if that makes any sense?!
If you can help me I would appreciate it!
Hi Nicola,
That question is a minor re-design. I can’t give an easy answer to that one. You have to change dimensions for your menu to make it taller and it depends on your graphics…and how you want them to look.
Sorry I can’t be more helpful! There are too many variables.
Thanks for your reply anyway sorry I wasn’t very specific! I think I have it figured out!
Awesome! Now I know who to ask if I want it done quick and easy. 😉
Ha don’t know about that! More like trial and error -hope I could remember how I did it!
LOL…you’ll remember…or just look in your php’s etc. That’s where it’s great keeping a ‘tips and tricks’ folder. Paste your changes into a text file and save it somewhere safe! You may be amazed how many times you refer to them! 🙂
Ah ha Great tip. I will start doing that right away! Thanks!
I love this theme, but don’t know how to edit the area in the very top nav bar on the right. Where “Posts” and “Comments” with icons are, we’d like to put contact info. Any help (simple hooks, maybe?) would be greatly appreciated.
Hi Sue,
In the ‘Editor’ (under Appearance), you will see a topnav.php. You can remove the comments and posts feeds and place your contact information in there. ~ Susan
Hi Susan, that worked beautifully! Thanks for being such a great resource, I’m enjoying your website and will check back often.
Best,
Sue
Thank you Sue. Glad to have been of help. Look forward to having you visit often! 🙂
How do I make my font size larger using CSS. Not sure where the code is?
Hi Paul,
Look for this in the ‘body’ section of the CSS:
color: #333333;
font-family: Georgia,Times New Roman,Trebuchet MS;
font-size: 18px;
line-height: 24px;
Let me know if you have any problems.
Thanks Sue…I found what you have given me and made the changes.
Great site you have. This is the second time you have helped me. I have bookmarked your site and will tell others.
Paul
It’s my pleasure Paul and thank you! 🙂
Thanks again Susan. I have one more request. How and where do I go to change the text title on all my blog posts on the CSS file?
Regards
Paul
Hi Paul,
You can do that here:
#content h1 {
border-bottom: 1px dotted #BBBBBB;
font-size: 20px;
padding: 0 0 5px;
…and I am happy to help anytime!
Thanks Susan.
But for some reason it does not work.
Here is my CSS
#content h1 {
font-size: 20px;
padding: 0 0 5px 0;
border-bottom: 1px dotted #D24F00;
————
But it still comes out black.
I am using the TinyMCE Advanced plugin. Could that be the reason why it will not change?
Paul
Hi Paul,
You have changed the dotted line to the orange color you desire…to change the title color, look for this code:
#content h1, #content h2, #content h3, #content h4, #content h5, #content h6 {
color: #444444;
font-family: Arial,Tahoma,Verdana;
font-weight: bold;
margin: 0 0 5px;
text-decoration: none;
Change the #444444 to #D24F00 and you will/should have the orange header.
This is great Susan. However, I only need the h1 title tag to be orange (the h2-h4 actually look good – Still undecided on this). Also the home page still shows the darker color.
Paul
Paul, for the home page it is on line 870 in your CSS…and looks like this:
#content h2 a, #content h2 a:visited {
color: #333333;
text-decoration: none;
Change the #333333 to your #D24F00.
As for your H2 and H3’s etc…you have to create separate code, using the H1 code above.